After looking at the G1ZH Raspberry Pi HAT, in this article we will look at setting up the required software. This consists of the firmware for the CC2652, Zigbee2MQTT and Mosquitto.
Preparation of the SD card
We use a current Raspberry Pi OS Lite as the basis, which we copy to an SD card using the Raspberry Pi Imager.
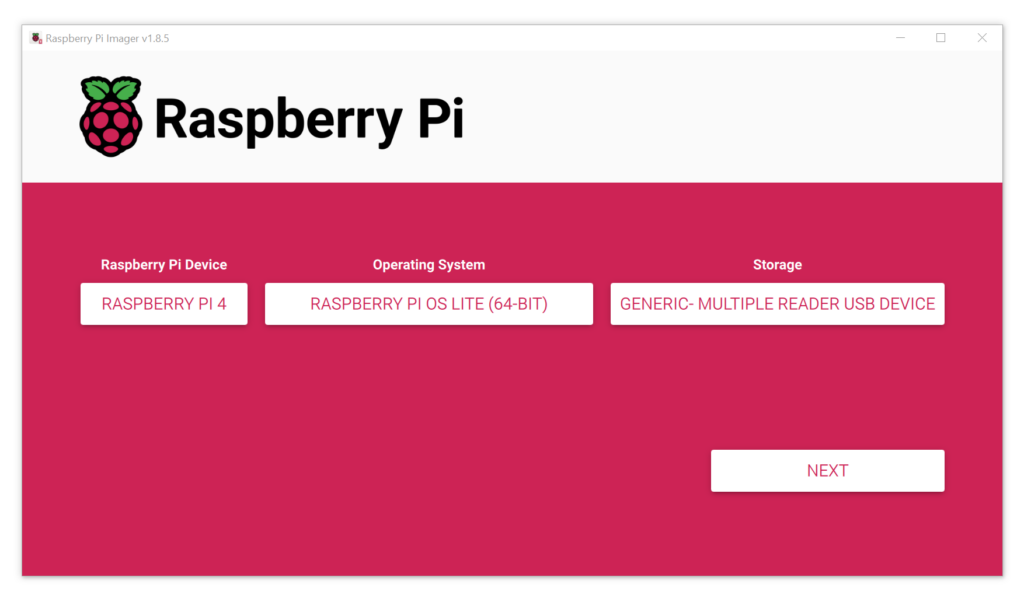
Some settings can be adjusted before the transfer is started.
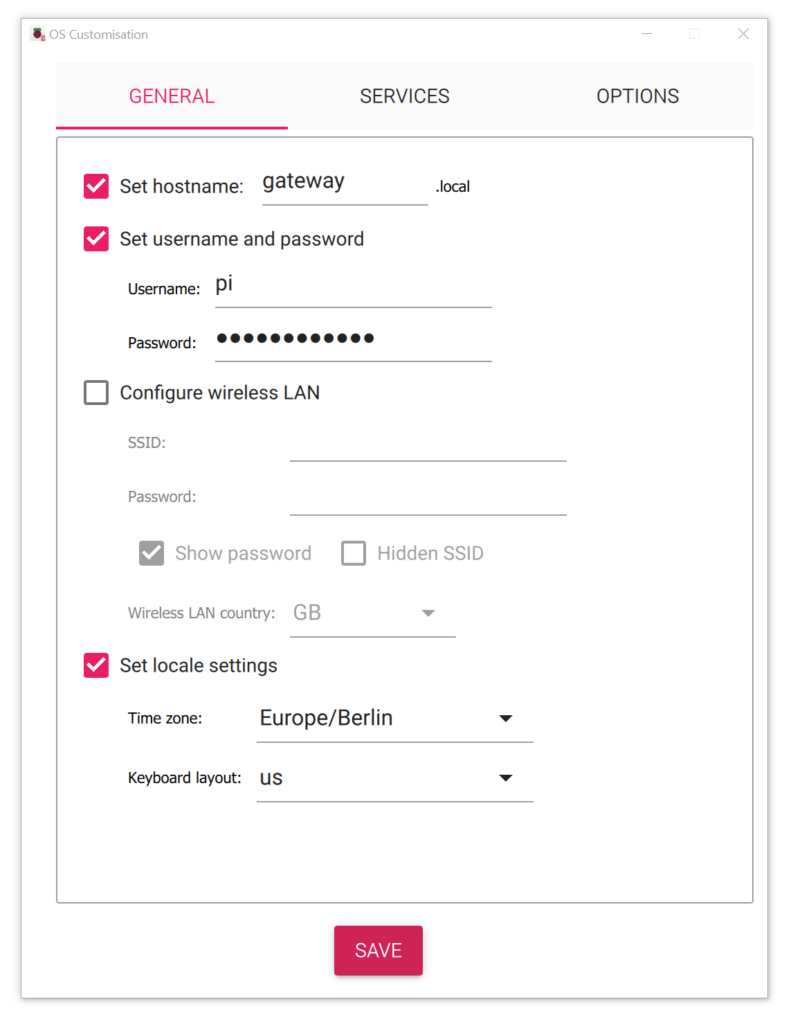
First of all, it makes sense to assign a hostname and set a user name and password.
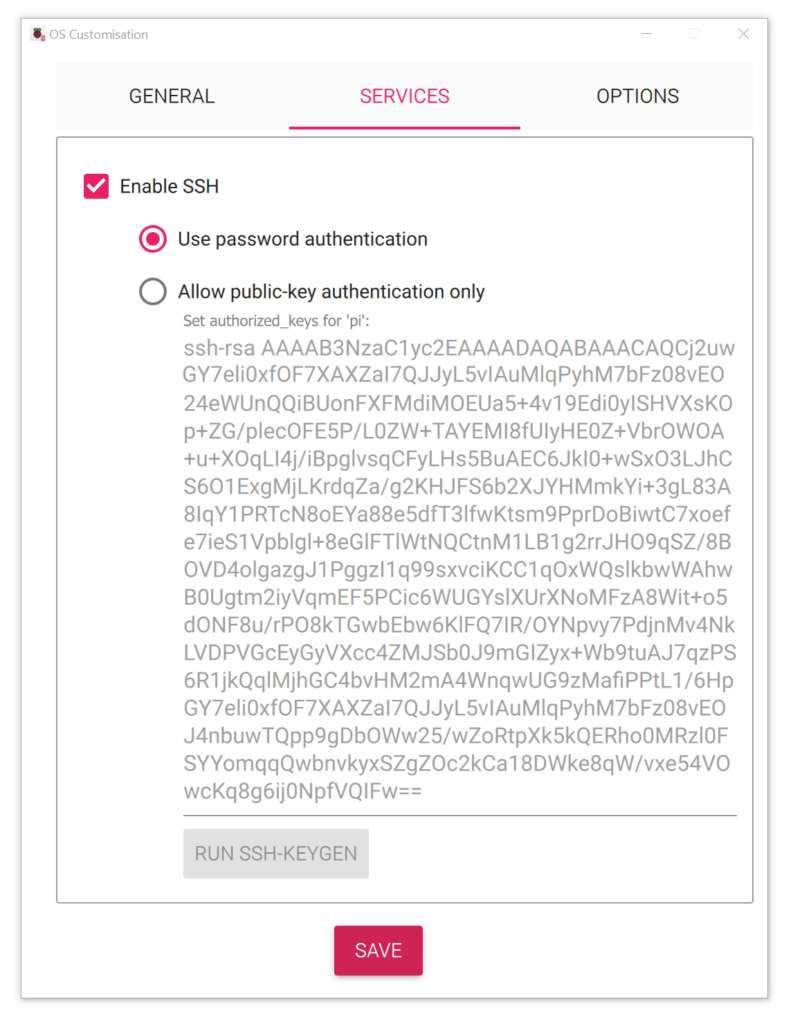
In order to be able to log in via the network immediately after starting, ssh should also be activated. The authentication can be done via password or key. By activating SSH, we avoid having to connect a monitor and keyboard to the Raspberry Pi.
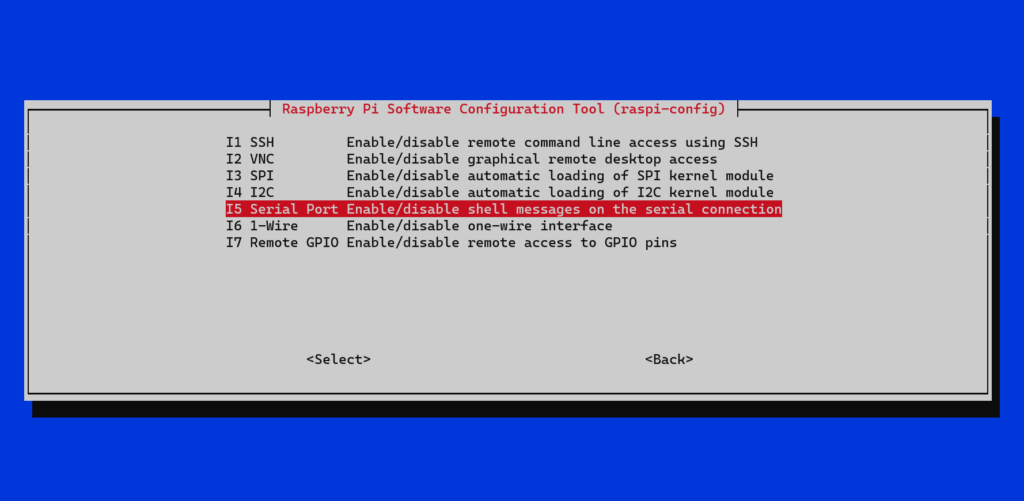
Enabling the serial interface
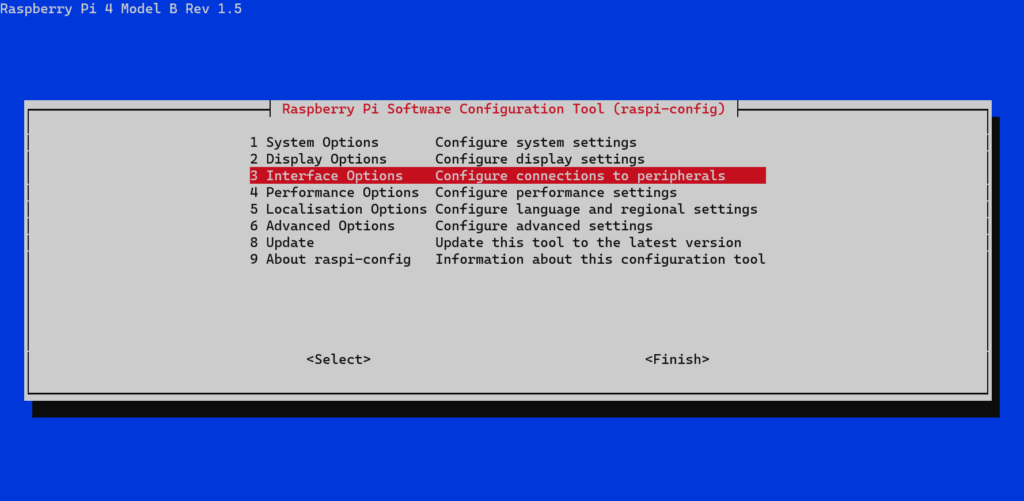
By default, the serial console is available on the serial port and thus enables a login. To be able to communicate with the Zigbbe module via the serial interface, we need to adjust some settings with sudo raspi-config.


MQTT Server
We will use mosquitto as the MQTT server, which is installed quickly.
sudo apt install mosquitto
sudo apt install mosquitto-clients
To test the MQTT server, we can first subscribe to a topic with the following command. In this example, the name of the topic is /test.
mosquitto_sub -h localhost -t /testNow we can publish in another terminal a message under this topic.
mosquitto_pub -h localhost -t /test -m "Hello!"To change the settings of the MQTT server we can edit the file /etc/mosquitto/mosquitto.conf. This allows the MQTT server to connect to other brokers, for example:
connection <client-name>
address <ip:port>
topic # out 0
topic # in 0
remote_username <username>
remote_password <password>
Firmware
We must now install the latest firmware on the CC2652. To do this, we first create a virtual Python environment, activate it and install a few required tools.
python -m venv gateway
source gateway/bin/activate
pip install pyserial intelhex
The firmware is installed using a Python script, which communicates with the serial bootloader of the CC2652.
cd gateway
wget -O cc2538-bsl.zip https://codeload.github.com/JelmerT/cc2538-bsl/zip/master
unzip cc2538-bsl.zip
So that the Zigbee module can now operate as a coordinator, we download the necessary firmware.
cd cc2538-bsl-master
wget -O CC1352P2_CC2652P_launchpad_coordinator_20230507.zip https://github.com/Koenkk/Z-Stack-firmware/raw/master/coordinator/Z-Stack_3.x.0/bin/CC1352P2_CC2652P_launchpad_coordinator_20230507.zip
unzip CC1352P2_CC2652P_launchpad_coordinator_20230507.zip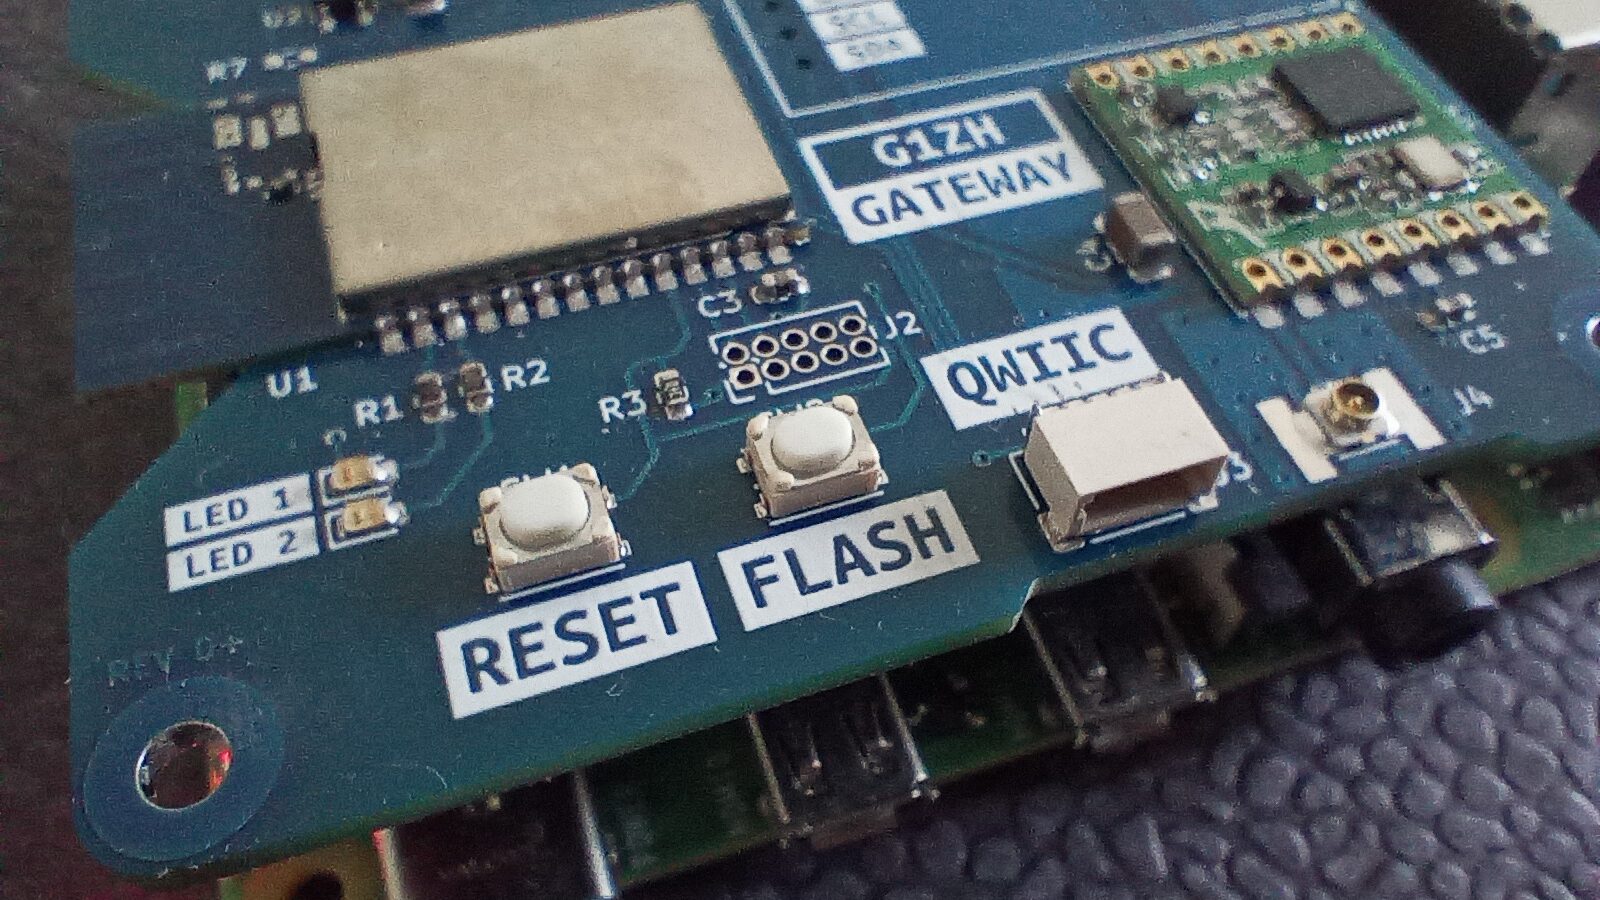
To flash the firmware, we need to set the module to BSL mode. To do this, press and hold the FLASH button. Then we briefly press the RESET button and can then release the FLASH button again. We can then flash the firmware with the following command:
python cc2538-bsl.py -evw -p /dev/serial0 ./CC1352P2_CC2652P_launchpad_coordinator_20230507.hexZigbee2MQTT
In the last step, we install Zigbee2MQTT based on these instructions:
sudo curl -fsSL https://deb.nodesource.com/setup_20.x | sudo -E bash -
sudo apt-get install -y nodejs git make g++ gcc libsystemd-dev

# Verify that the correct nodejs and npm (automatically installed with nodejs)
# version has been installed
node --version  # Should output V18.x, V20.x, V21.X
npm --version  # Should output 9.X or 10.X

# Create a directory for zigbee2mqtt and set your user as owner of it
sudo mkdir /opt/zigbee2mqtt
sudo chown -R ${USER}: /opt/zigbee2mqtt

# Clone Zigbee2MQTT repository
git clone --depth 1 https://github.com/Koenkk/zigbee2mqtt.git /opt/zigbee2mqtt

# Install dependencies (as user "pi")
cd /opt/zigbee2mqtt
npm ci
# If this command fails and returns an ERR_SOCKET_TIMEOUT error, run this command instead: npm ci  --maxsockets 1

# Build the app
npm run build
Before we can start Zigbee2MQTT, we need to create a configuration:
cp /opt/zigbee2mqtt/data/configuration.example.yaml /opt/zigbee2mqtt/data/configuration.yaml
nano /opt/zigbee2mqtt/data/configuration.yaml
The configuration can essentially be adopted, only under serial the port must be set to /dev/serial0.
To run Zigbee2MQTT as a demon, we need to create the following configuration file:
sudo nano /etc/systemd/system/zigbee2mqtt.serviceand enter the following:
[Unit]
Description=zigbee2mqtt
After=network.target

[Service]
Environment=NODE_ENV=production
Type=notify
ExecStart=/usr/bin/node index.js
WorkingDirectory=/opt/zigbee2mqtt
StandardOutput=inherit
# Or use StandardOutput=null if you don't want Zigbee2MQTT messages filling syslog, for more options see systemd.exec(5)
StandardError=inherit
WatchdogSec=10s
Restart=always
RestartSec=10s
User=pi

[Install]
WantedBy=multi-user.target
We can then start Zigbee2MQTT:
sudo systemctl start zigbee2mqttIf everything works, we can set systemctl to start Zigbee2MQTT on boot:
sudo systemctl enable zigbee2mqtt.serviceThis sets up the gateway. At http://gateway.local:8080/ you will find a graphical user interface that enables simple administration of Zigbee2MQTT.
Leave a Reply